🛠️ Revive Your Washer, Revive Your Peace of Mind!
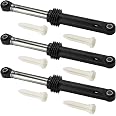
This Front Load Washer Tub Bearings and Seal Kit is a high-quality replacement part designed for LG and Kenmore washers. It includes essential components like the tub seal, tub seal gasket, and both large and small bearings, ensuring a quiet, leak-proof, and smooth operation. With precise engineering and easy installation, this kit is the perfect solution for common washer issues, saving you money and hassle.


M**K
Some lessons learned
I just went through this bearing replacement in my LG washer and thought I'd share some tips. The old bearings are hard to get out. I tried everything and ultimately the answer is "use something bigger". I sprayed PB Blaster on both bearings first. To get the tub out of bearings in the outer shell, suspend the edges on sawhorses, wood, or cinder blocks. Use a 2x4 to protect the shaft and hammer it downward. Should fall right out.For the front bearing I failed many times with screwdrivers, chisels, claw hammers, etc. What worked- get at least a footlong iron pipe, rebar, or something solidly strong, feed it through the outer bearing and then alternate hitting the left and right backside of the front bearing with a sledgehammer, the bigger the better. Took a while, but mine eventually dropped out.Getting the rear bearing out was impossible. I read a plumber tip that said to screw a sacrificial bolt into your drum spline threads, similar to the one you took out. You could probably use the original since it didn't damage my sacrificial bolt at all. Then put the tub back into the outer shell. Hold it at waist height and drop it so the bolt hits something solid like concrete. My bearing popped right out first try.To get the new bearings in, clean the holders really well and put a thin coat of dish soap on it. Lay your old bearing on top of it to pound it into the holder, tapping evenly around the race until it's flush.One last tip, if you put it all back together and the spline isn't sticking far enough out of the back of the tub case to get the bolt in, don't take it all back apart. Just use something to pull the spline towards you. I used a cloth over the spline and pulled it towards me with pliers.
M**M
Fixed washer
This fixed my washer and saved me from buying a new one! Fast delivery also!
E**G
Wash machine tub bearing kit
I heard that bearing going out for about 2 weeks and I knew what I was in for. Ease of installation? Ha! It actually isn't that bad! I have a bearing press and pullers and such. Putting the new one in had to be done the old fashioned way though. With a drift, at least in my case. But with patience (and I have a lot) the bearing race and bearing went in and the seal as well. Everything fit snug. No noise when I was done. Ironically, my worst problem was getting the door seal put back in properly. Lol
M**1
STOP!!!! Don't buy. GARBAGE product, monster job, buy OEM
The media could not be loaded. Update #2 11/17/2020 - This item is complete garbage. "THESE" bearing lasted 2 months before starting to degrade, so again I replaced them with OEM LG bearings. 7 Months with a Genuine LG Bearing still sounds silent like a new washer. My advice stick with OEM. This is a monster job, you don't want to do it twice like I had to.Update 4/2/2020 GARBAGE!!!! I'm giving a generous 2 Stars, because after 2 months these bearings started to fail, sounding like before I replaced them. Now at 6 months these bearing are in total failure, louder than the 10 YEAR old ones on the OEM (listen to the video, these are the new bearings after 6 months). Just ordered LG bearings. I will wait 2 months and post another review to rule out any other part causing the failure. If the LG ones work I'm dropping to 1 star.First this is a monster undertaking will take a full day, but the end result is a super quiet washer again. Tips: 1. Buy a new front door gasket, shocks and lg spring expansion tool, you take off these items anyway. The spring expansion too is the best 25 dollars you will spend. Took me 30 minutes for 1 gasket spring installation, cuts on my hand and bruises on my knuckles without the tool 2. YouTube video for installation and use ziplock bags to label, keep track of screws, 3. Use a sledge hammer, hit drive shaft directly square on top, it will easily separate it from bearing without damage. I used a mallet, sledge with a piece off wood, shaft didnt budge even hitting it hard as I could. Hit shaft once with a sledge hammer directly, with 1/2 the force worked like a charm. 4. Use a thin film of laundry or hand soap on bearings and door gasket spring grooves. Will make installation much easier. 5. Remove the bars on inside of drum, only takes 2 screws. Mine were caked with soap scum underneath. If you ever got that grey slime on clothes this is why. Clean all soap scum out of tubs and stainless drum too. Good luck
D**E
Get the right tools for the job.
Installed these TWICE in my LG Tromm front-loader that sounded like a jet engine on the spin cycle. The first set didn't last more than about 3 months. I believe I messed them up on installation. Using a hammer (even if careful) to install these may mean you've shortened the life of them in a massive way. After 3 months they were noisy again and inspection showed them to be completely disintegrated and had leaked all of their grease. They had tons of play and were worse than the originals.The SECOND time I'm more confident that they'll last. I used a bearing pusher / puller to install properly, which makes the job 100x easier and pushes them in with no risk of damage. Now my machine is as quiet as when it was new.Note: it's best to buy a new drum spider when replacing these and you'll need to apply a small amount of grease on the seal washer in order to avoid squealing where the rubber meets the metal shaft.I'll update this review if the new set deteriotes like the first, however I'm pretty confident it was my 'heavy handed' first installation that set the first set up for failure.Edit: 4 months later and we’re still golden. Will update after more months have passed.Edit: 13 months in... still good.Edit: 16 months and counting. A-ok.(Hint: bearing pusher is the key to a successful installation)
Trustpilot
3 weeks ago
3 weeks ago